Last week, I finally received my new robot controller board after more than three weeks of waiting. Well, actually, a complete new robot kit, since the controller board is not sold separately. Good thing as well, because as it turns out, the original GoPiGo is not available anymore (in NL), and the new one I received is a GoPiGo2… which is not compatible with the original GoPiGo. Allow me to elaborate….
The robot controller board features two encoders, which are sensors that can measure how much each wheel has actually turned. The GPG2 controller board has a slightly different layout than the GPG1… and among others things, this means a different spaced width between the two encoder sensors. This is kind of a big deal, since the encoders themselves slide through the acrylic base plate to connect to the wheels. That’s right kids, in order to use the GPG2 controller board, you also need to use the GPG2 base plate with the differently spaced encoder holes.
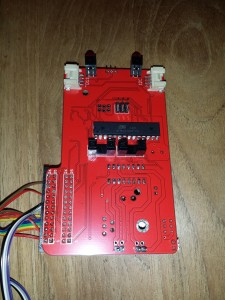
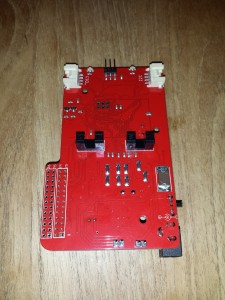
Side-by-side comparison of the GoPiGo1 (left image) vs. the GoPiGo2 (right image) controller board… the two black U-shaped things are the encoder sensors.
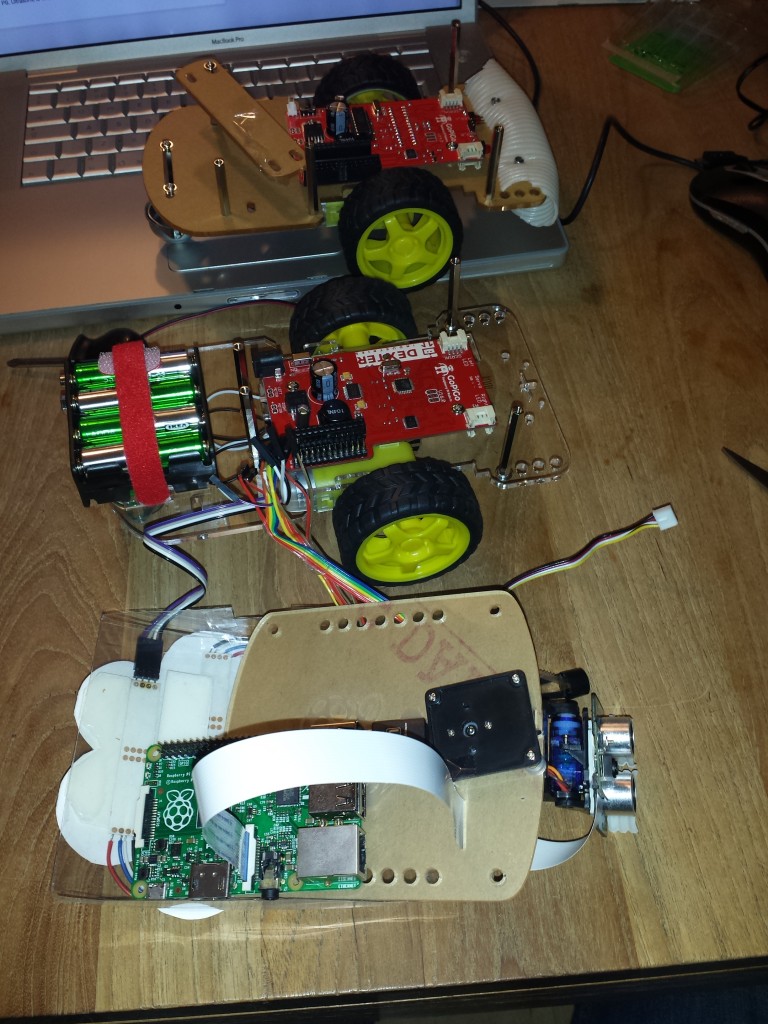
But wait, there’s more! Because they threw backwards compatibility out of the window anyway, the dear folks from Dexter Industries saw it fit to change the location of the supporting pillars for the top plate as well! Be that as it may, my GPG1 customized top plate took me about 3 hours, several power tools and some cuts in my fingers to carve into exactly the right form… and I am definitely not going to do that all over again.
So, this is how it went down: a complete rebuild of the chassis (including motors, encoders, wheels) and a new pin header soldered for connecting the GPIO peripherals. Then I took my super awesome upcycled sewage drain front bumper and the labor intensive custom hole top plate from the previous build, and whipped them into shape to fit the new chassis. Just add Raspberry Pi, the head module and the LED shield and be done with it. And so, the little mishap that started with a shorted power circuit and a curl of smoke ended with an almost-full-body transplantation.
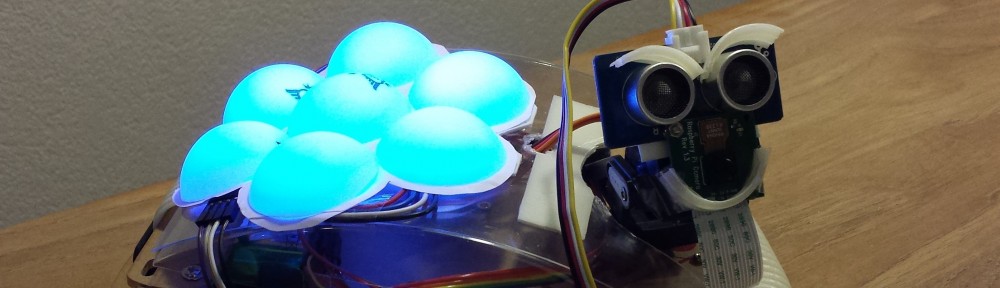
Somewhere halfway in the transformation from FRAC#1 (top) to FRAC#2 (middle)…
But now, it’s done, and it was all worth it: FRAC is moving again! And for good measure, I also took some time to properly wire up the buzzer, so this means that for the first time since this project started, all the parts are working… now I better start programming so that I can share a nice full-feature demo video soon!
So, what do you think of the incompatibility between the old and the new GoPiGo kit? If you have further questions about the difference between the two, just let me know in the comments below!
They’d better had good reasons for these updates… Looks like a massive amount of work! You still got off pretty okay, that top plate is a pain! Perhaps if you were really moving to a 2.0 version (while 1.0 was still intact), it would be okay, but not if you are just replacing a component :\
Yeah, I guess they didn’t really count on anyone buying a second kit to be used as replacement parts for the first kit… well, what can you do, except whine about it ?